Understanding Group Sets and Groups
Groups and Group Sets help instructors organize students into teams. At least one Group Set must exist before any Groups can be created.
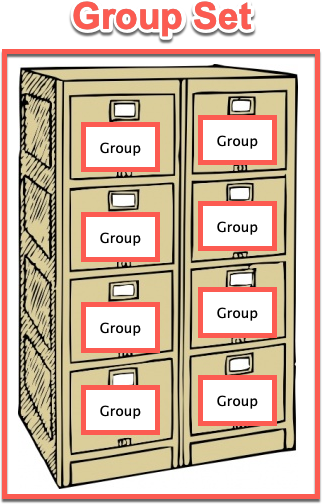
A Brief Analogy
Group Set = A filing cabinet
Group = A drawer in the filing cabinet
Member = A hanging folder in the drawer
Important: Group activities in Canvas are assigned and associated with the filing cabinet, not the individual drawers (see below). Just as an office can have many filing cabinets, a Canvas course can have many Group Sets. Students can be members of multiple Group Sets but can be a member of only one group per set.

Open the People page [1]. Next, click the "+ Group Set" button [2]. Configure the group set. It is not necessary to create the groups at this point. The groups can be created later if necessary by returning to the People page and clicking the name of the Group Set above the course roster.
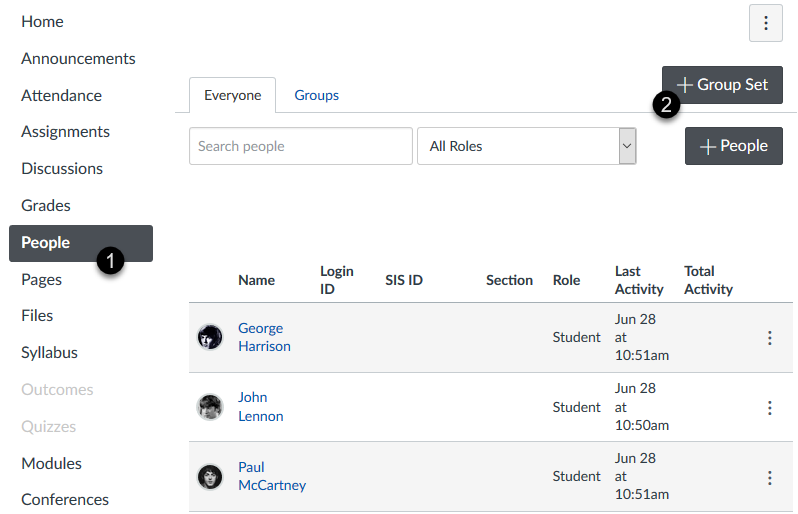
How do I add a group set in a course?
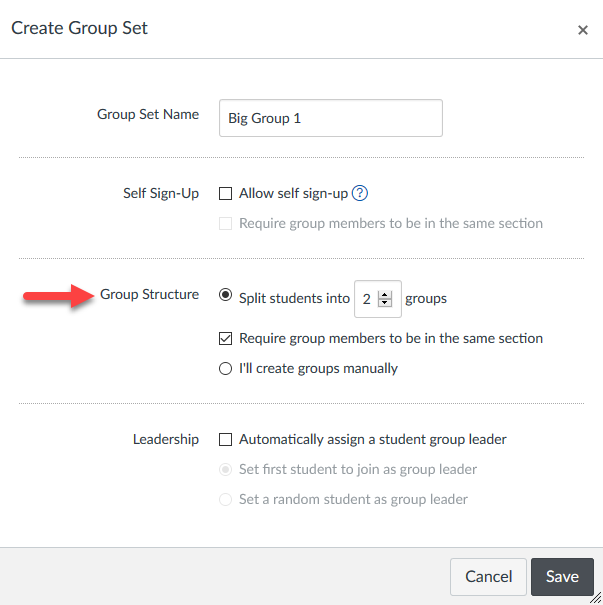
Use the Group Structure area to specify how the groups will be structured, and where the students will be placed.
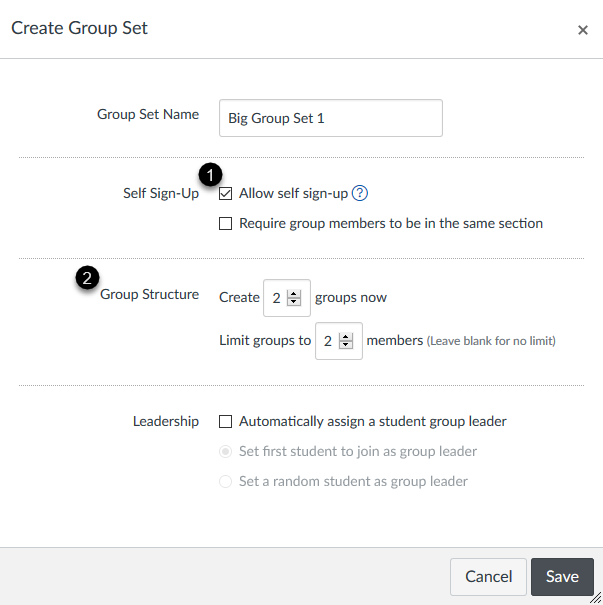
Enabled students to join the group of their choosing by ticking the checkbox and setting the maximum number of people per group.
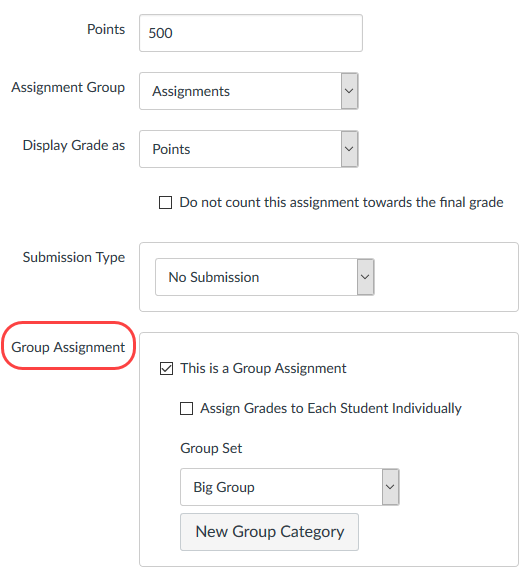
You can create a group assignment by using the Group Assignment checkbox. Canvas uses group sets to assign group assignments, and each group within the group set that is assigned to the assignment is required to complete the assignment. All groups will complete the assignment using the same due date.
Note: It is not possible to use individual groups as the basis for differentiated assignments, such as assigning an activity only to a single group or configuring unique due dates for specific groups. Only Group Sets can receive special settings in assignments.
You can create a single prompt and have groups to discuss it, either as a graded or ungraded activity. Simple associate the discussion with an existing Group Set (or create a new one on-the-fly).
Be sure the Group Set has Groups before you open the discussion activity to students!
How to Create a Group Discussion
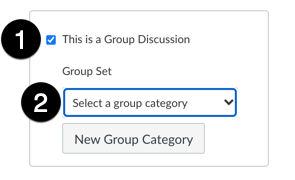
On the settings page of the discussion, check the box "This is a Group Discussion" [1]. Then, open the Group Category menu to select the Group Set that will govern the group organization for the activity [2]. Alternatively, click the "New Group Category" button if you would like to create the Set to be used by the discussion.
Important: Students must be placed into a Group in order to properly participate. Students who are not in a group can still post, but the posts are only visible to the instructor and other students not in a group.
How Students Participate in a Group Discussion
To participate, students click the link for the Discussion activity and begin posting. They are automatically participating in their group and do not need to do anything special to "enter" or "join" the discussion. Students cannot view other groups' posts.
How Instructors Monitor a Group Discussion
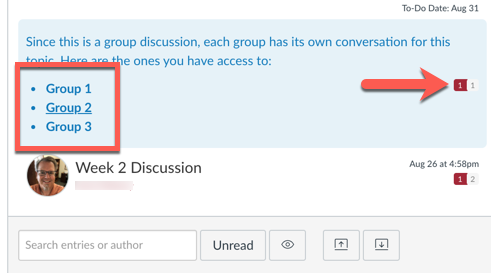
Instructors can get an overview of activity in the groups by opening the discussion activity link and viewing the information at the top of the page. New posts are indicated in the badges on the far right. To view a group's discussion, click the link for the group on the left.
Viewing Another Group
After reading one group's discussion, click the "Home" link in the left navigation menu and then click the breadcrumb link for the course at the top of the page to return to the home page. Find the main link for the discussion and re-enter it. Sorry, this is really an area where Canvas could be improved.
As an instructor, you can view what is happening in groups by viewing each user group from the People page of the course. You can view student activity within the group and view group-created content. You can also access student groups to create group collaborations and add other group-specific content if necessary.
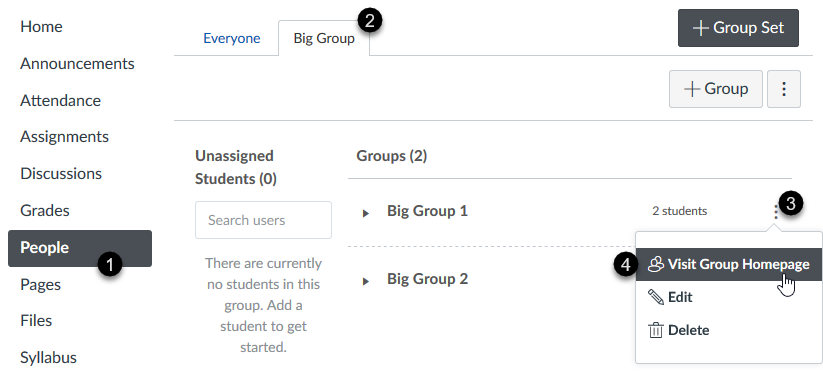
How do I view content and student activity within a group as an instructor?
Updated: June 27, 2025