Our photography showcases our unique community and location and connects Stan State to people in ways that words can’t.
Our photography style is warm and vibrant with crushed blacks (minimal details in the darkest parts of the photo) and bright, natural light.

Note: Cropping tightly on details in photography can emphasize action and help the viewer feel more engaged with the scene.
Use both candid and posed portrait photography to capture the spirit — the people — of Stan State. Aim to show your subjects in authentic settings with natural expressions. When possible, use natural light.

From indoor facilities to natural landscapes, use environmental photography to share the full Stan State student experience. When possible, include human interaction.

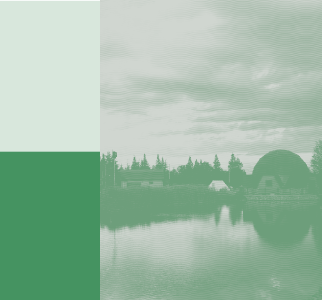
Color duotones are an effective way to add color and create a neutral backdrop for text and graphics. We also use duotones to add texture to our semi-circle graphic elements.
To make a photograph into a duotone, open the image in Photoshop. In the top menu, select Image > Mode > Grayscale. Save the image as a TIFF or JPEG, and import it into InDesign. Click once on the image to change the background color. Click twice to change the foreground color.

Background - PMS 200 C
Foreground - PMS 200C at 40% Shade
Transparency: Multiply

Foreground - PMS 3015 C at 40% Shade
Transparency: Hard Light
Background - PMS 7730 C at 20% Tint
Foreground - PMS 7730 C
Transparency: Normal
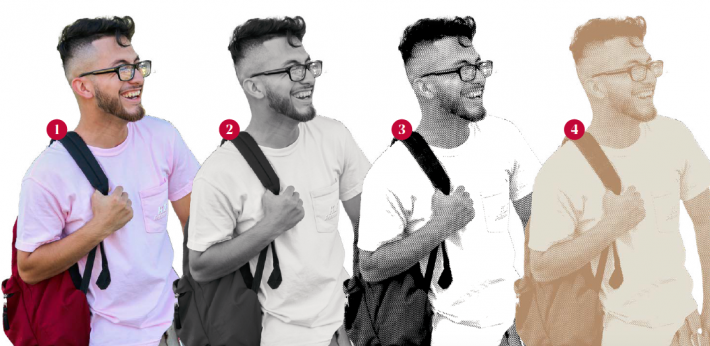
Our brand pattern overlay can be used on portrait and environmental photography to create distinct, brand-driven images.
How to Make It
- Cut-Out Image
Select a candid or posed portrait. Use Adobe Photoshop to cut-out your image with the tool of your preference. - Make It B&W
Use Image > Adjustments to set your image’s saturation to zero (grayscale). - Add “Pattern Overlay”
Add a “Pattern Overlay” layer style by double-clicking on your image layer. Set the transparency to “Hard Mix.” Select the supplied “wave” pattern from in the dropdown. Make sure “Preview” is selected and change the scale of the pattern as desired. - Add Color
Use Layer > New Adjustment Layer > Gradient Map and the provided gradients to apply our brand colors.
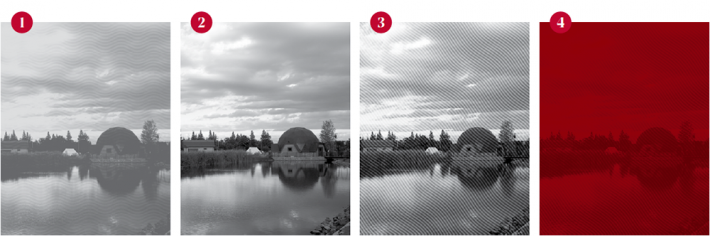
When using the pattern overlay on environmentals, we combine the steps used on the previous pages to make a duotone and apply a pattern overlay.
How to Make It
- Select Image
Select a high-quality, environmental shot that you’d like to use as a background element and adjust it so there is high contrast. - Make It Grayscale
Change the color mode using Image > Mode > Grayscale. - Add “Pattern Overlay”
Unlock the layer and add a “Pattern Overlay” layer style by double-clicking on your image layer. Set the transparency to “Soft Light.” Select the supplied “wave” pattern from in the dropdown. Make sure “Preview” is selected and change the scale of the pattern as desired. Save the image as a TIFF or JPEG - Add Color
Import the image into InDesign. Click once on the image to change the background color. Click twice to change the foreground color.
Updated: August 30, 2023