Part of the Canvas Basics series
Welcoming Students into the Course
Making it clear to students what they need to do to get ready for your course is a great practice to follow. Create a Module containing a welcome message and instructions for getting started.
Uploading Your Syllabus
It is a good practice to give your students access to your syllabus in a very clear space. We recommend creating a Module that welcomes your students to your course and using this area to upload your syllabus. Canvas calls these content work areas, Modules. Once your welcome module is created, the upload process can be done by following these steps.
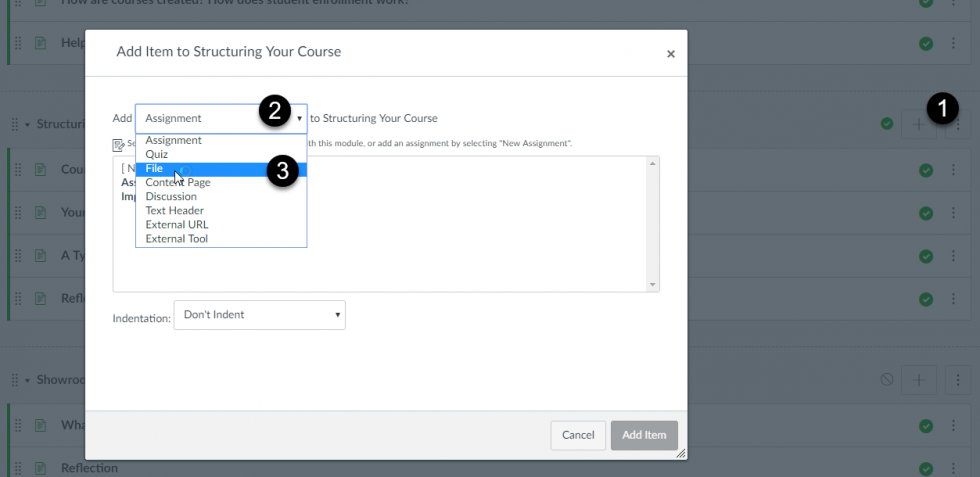
- Click the plus symbol on the right side of your module.
- Select the drop down menu labeled Add (it will typically be on Assignments and keeps the last setting you chose from this interface).
- Select File from the drop down menu.
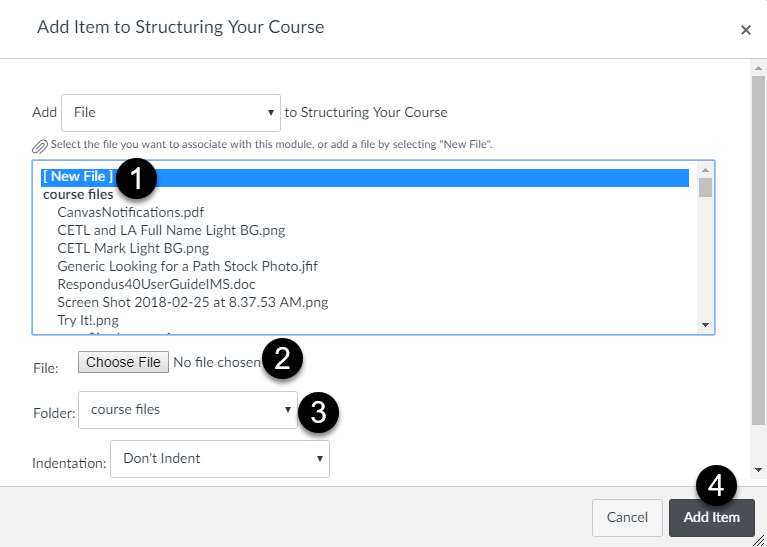
- In the new sub-menu select New File.
- Below that interface you have the option to Choose File, select this option and browse for your syllabus file in your computer's folders and select it.
- In the Folder drop down menu, identify the folder where you would like this File to be saved in Canvas. This is a copy so you can reuse files within Canvas later on.
- Indentation levels allow you to move items displayed in Modules indenting left of the label degrees for your choice of organization; select your preference, Don't Indent is the default.
- Click the Add Item at the bottom of the interface.
For more support, you can also explore These Canvas Guides:
How do I bulk upload files to a course?
How do I restrict files and folders to students in Canvas?
Adding Assignments and Course Content
Assignments and Course Content in Canvas are generally presented in modules for organization. This is what allows students to go either to and from, previous or next, between Pages and Assignments easily through the Canvas interface. As you make your Modules for Content or Weekly/Topic oraganization it is easiest to add your Assignments and Content there.
Explore our Assignments and Activities page to learn more about building out your course in Canvas.
Explore our Presenting Your Course Content page to learn more about showing and developing your course.
Publishing Your Course
The ability for students seeing content and assignments in your course depends on your Publishing the content. The "little green check mark" by all modules, pages, assignments, etc. means an item is published and therefore, visible to students. This is also true in a more broad sense when students cannot see your course when they get enrolled at the beginning of a term or, if you can't seem to add and copy material from your course. This means the course or item is still unpublished and invisible. The "grey not symbol" means an item is unpublished and therefore invisible.
To publish items in the course, simply select the "grey not symbol" next to an item and make sure it changes to a "little green check mark." To publish a course, follow the steps below.
- Log in to your Course.
- Select the Home button on the left of your page in the Course Navigation.
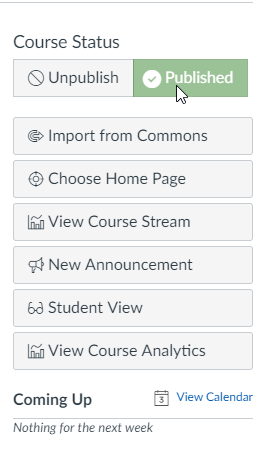
- On the far right of the Home Page there should be a column of grey buttons with options for the course. The top buttons will be for Unpublish and Publish.
- By default, Unpublished is selected and in a kind of light red.
- To Publish and show the course, select the Publish button.
- The Course is now Published and visible.
- To Unpublish the course, simply select Unpublish, if you need to continue working and hide material.
NOTE: When Publishing a course for the first time, Canvas will automatically publish all of your Course Modules, though not all of its internal content, like assignments, discussions, or quizzes.
Information on this page is adapted from content created by the Center for Effective Teaching and Learning at Cal State L.A.
Updated: August 18, 2022